How to Preserve Old Photos: A Complete Guide for Protecting Your Family Memories
I learned the importance of photo preservation the hard way. When my mother passed away ten years ago, I inherited three shoeboxes of family photos—some dating back to the 1920s. They were stored in her attic, wrapped in rubber bands, stuffed in deteriorating envelopes. By the time they reached me, many were yellowed, stuck together, or had pieces missing. I spent months trying to salvage what I could, wishing I had known then what I know now.
Last week, a customer named Margaret from Ohio reached out to us in tears. She'd discovered her childhood photo albums in her basement after a minor flood, and decades of precious family memories were stuck together, moldy, and seemingly ruined forever. "I wish I had known how to preserve them properly," she said, echoing the same regret I felt years ago. "Now it might be too late."
Margaret's story breaks my heart because it's so preventable. After we successfully restored 47 of her 52 damaged photos (including her parents' wedding portrait from 1952), she asked me to write this guide. "If it helps even one family avoid what I went through," she said, "it will be worth it." So today, I want to share everything I've learned about photo preservation—not just from running RestoreClick and restoring over 10,000 photos, but from my own family's journey and the lessons learned from customers like Margaret.
Why Old Photos Deteriorate (And How to Stop It)
Before we dive into preservation techniques, it's important to understand what destroys photos in the first place. The main culprits are:
Light Damage
Sunlight and even indoor lighting cause photos to fade over time. UV rays break down the chemical compounds in photo paper, leading to that telltale yellow tint we see in old pictures.
Temperature and Humidity
Heat accelerates chemical reactions that cause photos to deteriorate, while humidity creates the perfect environment for mold and mildew growth.
Chemical Damage
Acidic materials like cardboard boxes, certain adhesives, and even some photo albums can cause photos to yellow and become brittle.
Physical Damage
Handling, bending, scratching, and improper storage lead to tears, creases, and surface damage that can be permanent.
The Complete Photo Preservation System
Step 1: Create the Right Environment
Ideal Photo Storage Conditions:
- • Temperature: 65-70°F (18-21°C)
- • Humidity: 30-50% relative humidity
- • Light: Dark storage away from all light sources
- • Air Quality: Clean, dust-free environment
I know this sounds technical, but you don't need expensive equipment. A climate-controlled closet in your home's main living area is usually perfect. Avoid attics, basements, and garages where temperature and humidity fluctuate wildly.
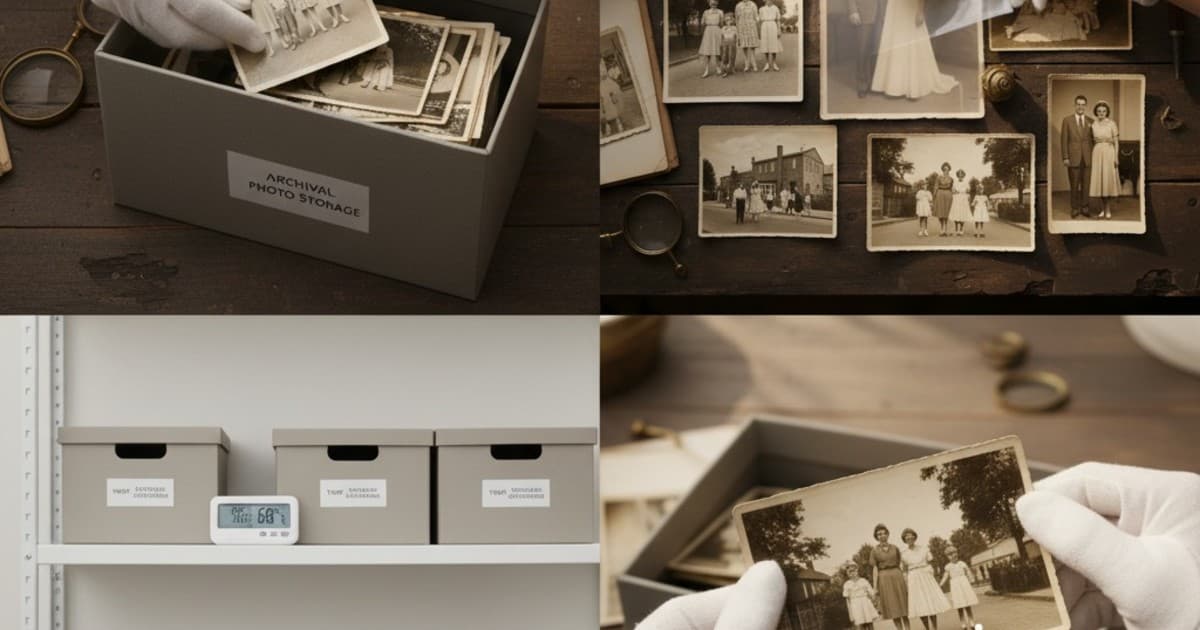
Step 2: Choose Archival-Quality Storage Materials
This is where many people go wrong. Those old cardboard shoeboxes? They're slowly destroying your photos with acid. Here's what to use instead:
Archival Boxes
Look for boxes labeled "acid-free" and "lignin-free." These are specifically designed for long-term photo storage and won't release harmful chemicals over time.
Photo Sleeves and Envelopes
Individual photo sleeves made from polyethylene, polypropylene, or Mylar provide excellent protection. Avoid PVC sleeves—they can actually damage photos over time.
Archival Albums
If you prefer albums, choose ones with acid-free pages and photo-safe adhesives. Never use magnetic albums or those with sticky pages—they're photo killers.
Step 3: Proper Handling Techniques
"Handle photos like you're holding a butterfly—gently, minimally, and with clean hands."
Always wash and dry your hands before handling photos. Better yet, wear clean cotton gloves. Hold photos by the edges, never touch the image surface, and support the entire photo when moving it.
Step 4: Digital Backup Strategy
Here's the truth: even with perfect preservation, physical photos won't last forever. Creating digital copies is your insurance policy. Here's how to do it right:
Scanning Guidelines
- Scan at 600 DPI minimum for family photos (1200 DPI for very small images)
- Use color mode even for black and white photos
- Save as uncompressed TIFF files for archival purposes
- Create JPEG copies for everyday use and sharing
Professional Digitization
If you have hundreds of photos or especially valuable images, consider professional digitization services. They have specialized equipment and expertise to handle fragile or damaged photos safely.
Common Preservation Mistakes to Avoid
The Sticky Note Trap
Never write on photos with ballpoint pens or attach sticky notes directly to them. The ink can bleed through and the adhesive can cause permanent damage. Instead, write on archival labels and attach them to photo sleeves or the storage container.
The Lamination Disaster
I can't stress this enough: never laminate old photos! The process is irreversible and can actually accelerate deterioration. If a photo needs protection, use a proper archival sleeve instead.
The Rubber Band Mistake
Rubber bands, paper clips, and staples all cause damage over time. Use archival-quality ties or simply rely on proper box storage to keep photos organized.
When Professional Help is Worth It
Sometimes, despite our best efforts, photos show signs of damage. Here are situations where professional restoration can save irreplaceable memories:
Consider Professional Restoration When:
- • Photos are already faded or discolored
- • You see tears, cracks, or missing pieces
- • Mold or water damage is present
- • Colors have shifted (especially in color photos from the 1960s-80s)
- • The photo is your only copy of an irreplaceable moment
Margaret's Happy Ending
Remember Margaret from the beginning of this post? We were able to restore most of her flood-damaged photos using AI technology. But more importantly, she learned from the experience. She now keeps her photos in archival storage in her bedroom closet, and she's systematically digitizing her entire collection.
"I never want to feel that helpless again," she told me recently. "Now I know my grandchildren will have these memories forever, no matter what happens."
Your Action Plan for Photo Preservation
Preserving your photos doesn't have to be overwhelming. Start with these three simple steps:
This Weekend's Photo Preservation To-Do List:
- 1. Assess your current storage - Identify photos in dangerous locations or containers
- 2. Order archival supplies - Get acid-free boxes and photo sleeves
- 3. Create a digitization plan - Choose which photos to scan first (start with the most valuable or fragile)
Already Have Damaged Photos?
If some of your precious photos are already showing signs of damage, don't despair. Our AI restoration technology can bring even severely damaged photos back to life.
Restore Your Damaged Photos

Lily
Founder & Lead Photo Restoration Specialist
Lily founded RestoreClick after personally restoring her grandmother's faded photographs. With a Computer Science degree and years of experience in digital imaging, she combines technical expertise with deep empathy for preserving family memories. Her work has helped thousands of families reconnect with their heritage through restored photographs.
Expertise & Credentials
- ✓10+ years in computer science and digital imaging
- ✓Specialized in AI-powered photo restoration
- ✓Restored thousands of family photographs